In today’s world, most eCommerce sites require the most basic to the most advanced and complex online stores. And the majority of them want to use WooCommerce to build their online store. This is mainly due to the features it provides and the ease with which it can be customized.
When you install Woocommerce on your website, many things are set up by default, such as a category page, a shop page, and a product page, but in some cases, users want to customize their product pages. woocommerce provides some hooks and actions to help with this.
Also Read: Add custom fields to WooCommerce registration form without plugin
In this article, I will show you how to Add / Edit or Change the Position Of the Default WooCommerce single product page.
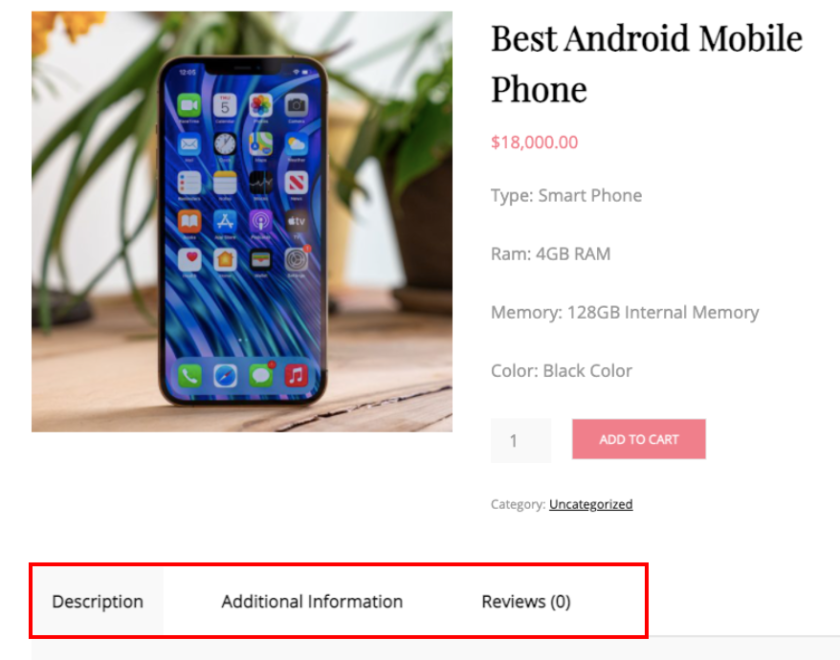
If you are using WooCommerce then you’ve probably noticed that there are three built-in WooCommerce Single Product Tabs that appears on your product page: Description, Additional Information, and Reviews. The look of these tabs is defined by your theme design.
In this tutorial, I’ll use a few actions and filter hooks provided by WooCommerce to add, edit and change the position of WooCommerce Product Tabs.
Are you want to get implementation help, or modify or extend the functionality?
A Tutorialswebsite Expert can do it for you.
Extra Custom Product Tabs for WooCommerce
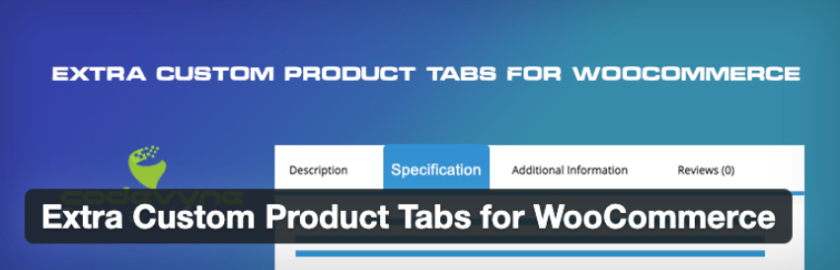
If you want to easily and quickly add multiple tabs for the WooCommerce product details page, then Extra Custom Product Tabs for WooCommerce is the simple and free plugin for you. This plugin allows you to add a number of custom product tabs with a variety of features.
Features:
- Option to Enable/Disable product tabs
- Create or Add multiple product tabs
- Remove product tabs anytime
- Custom product tab content displayed on the front end
Video Documentation:
Add a custom WooCommerce Single Product Tabs
To add a custom tab on the WooCommerce single product page, you have to use the ‘woocommerce_product_tabs’ hook and write a custom function like ‘wcpm_custom_product_tabs’. You can name the function whatever you want.
Add the below code snippet in your theme functions.php file:
add_filter( 'woocommerce_product_tabs', 'wcpm_custom_product_tabs' );
function wcpm_custom_product_tabs( $tabs ) {
// Add the new tab
$tabs['quote_tab'] = array(
'title' => __( 'Ask For Quote', 'woocommerce' ),
'priority' => 50,
'callback' => 'wcpm_quote_product_tab_content'
);
return $tabs;
}
function wcpm_quote_product_tab_content() {
// The new tab content
echo 'Here\'s you can add your ask for quote form .
';
}

Also Read: How to add Conditional Checkout Fields in WooCommerce
Edit or Rename Tabs
To Edit or Rename the tab on the Woocommerce single product page, you have to use the ‘woocommerce_product_tabs’ hook and write a custom function like ‘wcpm_edit_rename_product_tabs’. You can name the function whatever you want.
Add the below code snippet in your theme functions.php file:
/**
* Rename product data tabs
*/
add_filter( 'woocommerce_product_tabs', 'wcpm_edit_rename_product_tabs', 98 );
function wcpm_edit_rename_product_tabs( $tabs ) {
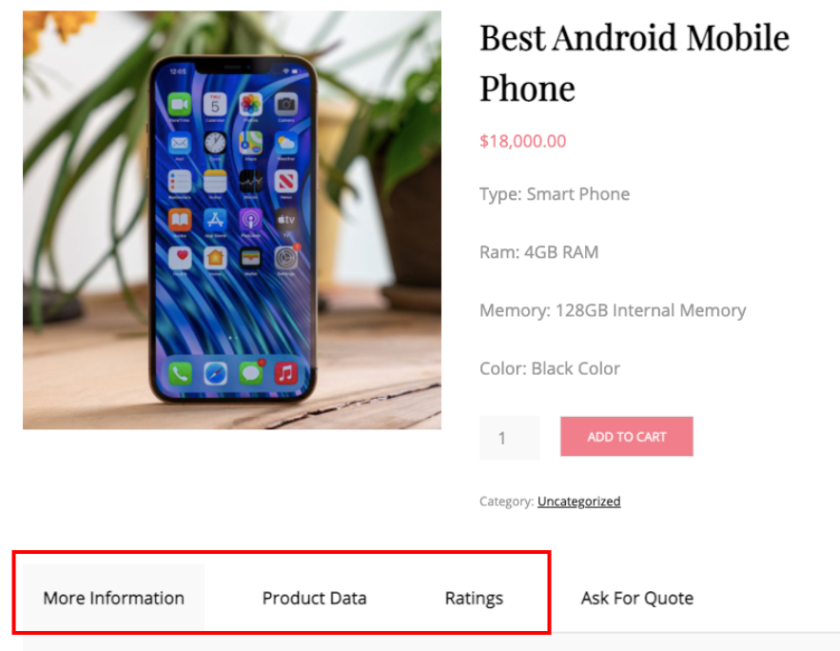
$tabs['description']['title'] = __( 'More Information' ); // Rename the description tab
$tabs['reviews']['title'] = __( 'Ratings' ); // Rename the reviews tab
$tabs['additional_information']['title'] = __( 'Product Data' ); // Rename the additional information tab
return $tabs;
}
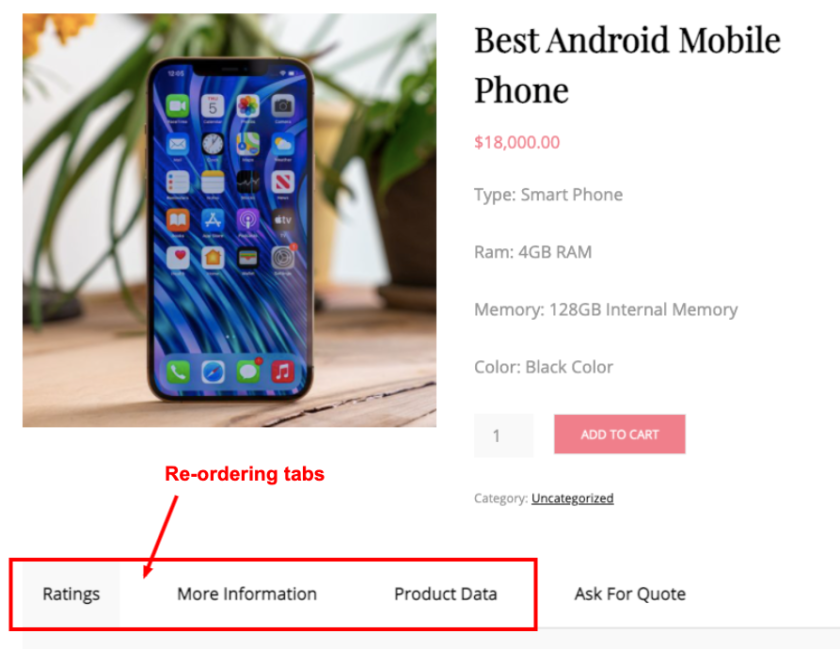
Re-order WooCommerce Product Tabs
To change / re-order the Position of default tabs on the Woocommerce single product page, you have to use the ‘woocommerce_product_tabs’ hook and write a custom function like ‘wcpm_reorder_product_tabs’. You can name the function whatever you want.
Add the below code snippet in your theme functions.php file:
/**
 * Reorder product data tabs
 */
add_filter( 'woocommerce_product_tabs', 'wcpm_reorder_product_tabs', 98 );
function wcpm_reorder_product_tabs( $tabs ) {

	$tabs['reviews']['priority'] = 5;			// Reviews first
	$tabs['description']['priority'] = 10;			// Description second
	$tabs['additional_information']['priority'] = 15;	// Additional information third

	return $tabs;
}
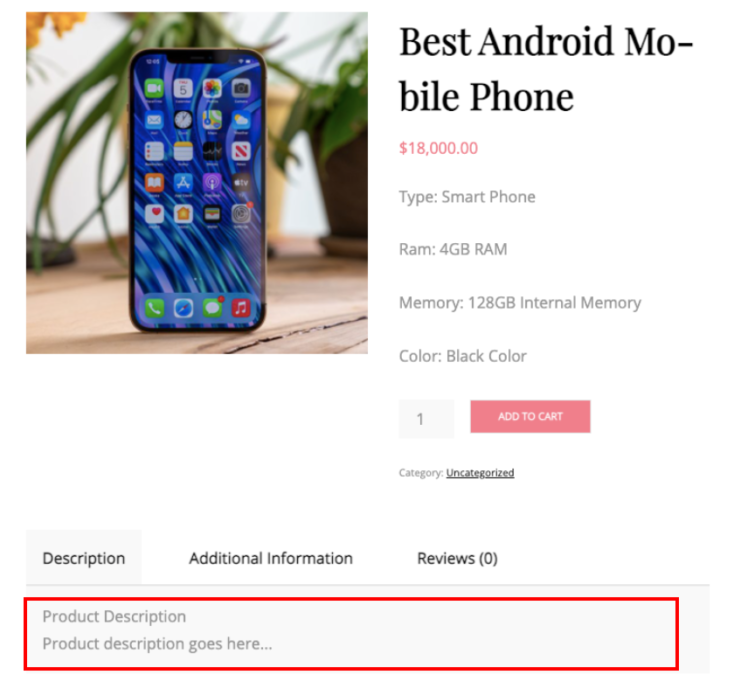
Customize Product Tabs
To customize the description tab content on the Woocommerce single product page, you have to use the ‘woocommerce_product_tabs’ hook and write a custom function like ‘wcpm_customize_description_tabs’. You can name the function whatever you want.
Add the below code snippet in your theme functions.php file:
add_filter( 'woocommerce_product_tabs', 'wcpm_customize_description_tabs', 98 );
function wcpm_customize_description_tabs( $tabs ) {
    $tabs['description']['callback'] = 'wcpm_custom_description_tab_content'; // Custom description callback
    return $tabs;
}

function wcpm_custom_description_tab_content() {
    echo 'Product Description ';
    echo 'Product description goes here...';
}
Remove Product Tabs
Add the below code snippet in your theme functions.php file to remove specific tabs.
/**
 * Remove product data tabs
 */
add_filter( 'woocommerce_product_tabs', 'wcpm_remove_product_tabs', 98 );

function wcpm_remove_product_tabs( $tabs ) {

    unset( $tabs['description'] );      	// Remove the description tab
    unset( $tabs['reviews'] ); 			// Remove the reviews tab
    unset( $tabs['additional_information'] );  	// Remove the additional information tab

    return $tabs;
}
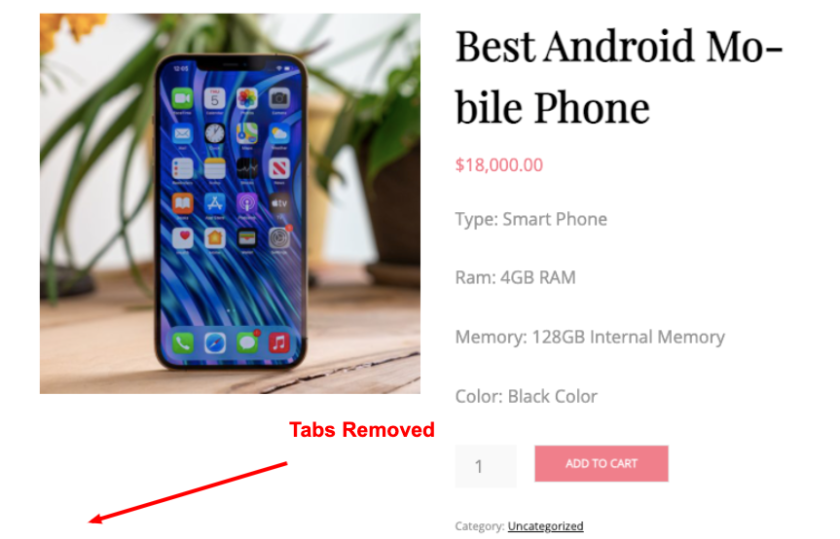
As in the above code, I removed all tabs from a single product page. You can remove any specific tab as per your requirement. You don’t need to remove all wooCommerce product tabs.
Conclusion
Well, In this article you will get the complete steps to How to Add / Edit or Change the Position Of Default WooCommerce Product Tabs. You can extend the functionality as per your requirement. I hope you found this tutorial helpful for your project. Keep learning!.
Having trouble? Are you want to get implementation help, or modify or extend the functionality of this script? Submit a paid service request


Pradeep Maurya is the Professional Web Developer & Designer and the Founder of “Tutorials website”. He lives in Delhi and loves to be a self-dependent person. As an owner, he is trying his best to improve this platform day by day. His passion, dedication and quick decision making ability to stand apart from others. He’s an avid blogger and writes on the publications like Dzone, e27.co