If you have an ecommerce website build with wordPress and WooCommerce platform then this article is helpful for you. As WooCommerce is one of the most popular e-commerce platforms. It consists of a variety of useful and great features that are beneficial to business owners and, in the same way, gives you the option to built a registration form for WooCommerce. By default, there are two fields, Email and Password.
However, sometimes you want to add your custom fields like First Name, Last Name and Mobile Number on registration form which can also be done.
The registration form of every e-commerce website is an essential part of the collecting of customer information. With the help of the collected data, you can organise and group your registered customers according to your needs and priorities.
So, in this tutorial, you will get every steps about how to add custom fields in WooCommerce Registration Form without plugin.
Also Read: Complete Steps to Create Custom Taxonomy in WordPress
Add custom fields to WooCommerce registration form
To achieve it, you need to follow below steps:
Enable WooCommerce Registration Form
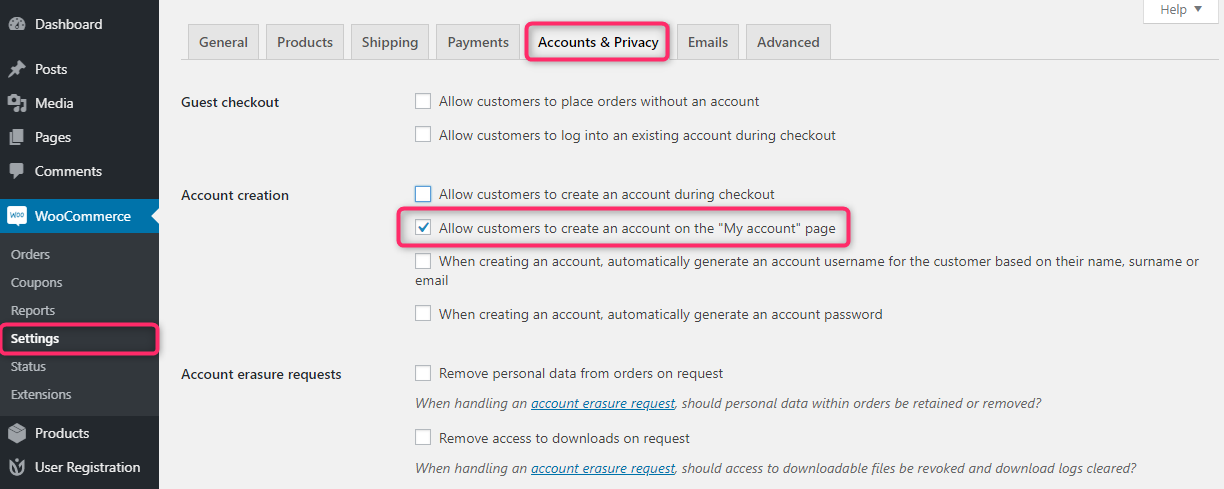
Logged In to your WordPress admin panel and navigate to WooCommerce → Settings from the left side of the dashboard:
Click on the Accounts and Privacy tab and check the option to the Allow customers to create an account on the “My Account” page option. Please refer below screenshot
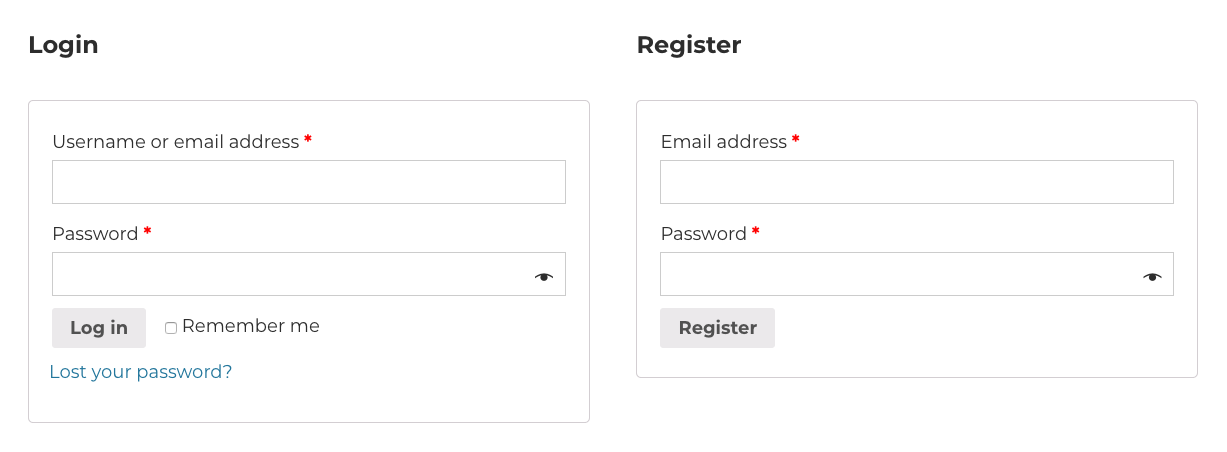
After enabling this option, you can see the WooCommerce registration form at the frontend. Please refer below screenshot.
Create an Extended Registration Form
Add Custom Fields to WooCommerce registration form Frontend
To include additional fields like first name, last name and phone number, and so on, include the following lines of code at the end of your current theme functions.php file, which are located in your theme folder.
// add custom fields to the frontend
In the above code, I have created function twooc_extra_register_fields() in which I have added the fields (First Name and Last Name and Phone ) which will show in the frontend. Please refer below screenshot..
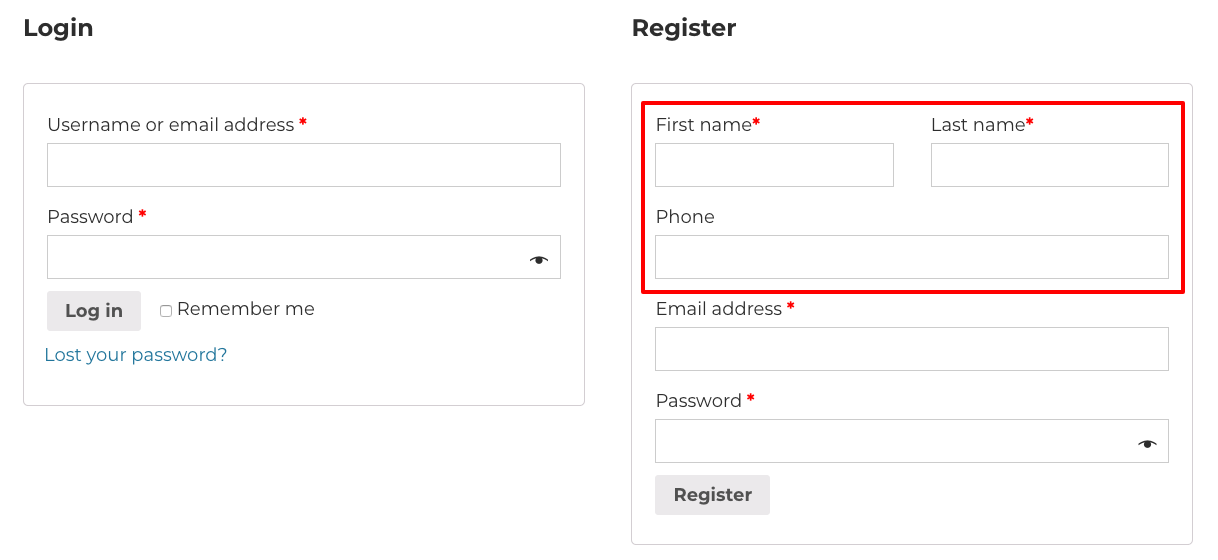
You can add more fields according to your need.
you have to include the prefix “billing_” before the field name. The following is a list of all the valid WooCommerce form fields that can be added to the registration form and can be associated with a billing address.
- billing_first_name
- billing_last_name
- billing_company
- billing_address_1
- billing_address_2
- billing_city
- billing_postcode
- billing_country
- billing_state
- billing_email
- billing_phone
Add Validations to Custom Fields
Now we just need to validate the newly added form fields. To validate these fields, please add the following lines of code to the end of the previous code in your function.php file,
/**
* Validate registration form custom fields.
*/

function twooc_validate_extra_register_fields( $username, $email, $validation_errors ) {
      if ( isset( $_POST['billing_first_name'] ) && empty( $_POST['billing_first_name'] ) ) {
             $validation_errors->add( 'billing_first_name_error', __( 'Error: First name is required!', 'woocommerce' ) );
      }

      if ( isset( $_POST['billing_last_name'] ) && empty( $_POST['billing_last_name'] ) ) {
             $validation_errors->add( 'billing_last_name_error', __( 'Error: Last name is required!.', 'woocommerce' ) );
      }

      if ( isset( $_POST['billing_phone'] ) && empty( $_POST['billing_phone'] ) ) {
             $validation_errors->add( 'billing_phone_error', __( 'Error: Phone is required!.', 'woocommerce' ) );
      }
         return $validation_errors;
}
add_action( 'woocommerce_register_post', 'twooc_validate_extra_register_fields', 10, 3 );
In the above code. I have created function twooc_validate_extra_register_fields( $username, $email, $validation_errors ) in which I have set validation that if the created custom fields are empty then show the message.
Save or Update Custom Fields Data to Database
Now you have to save these custom fields data to the database.To do so, add this below code after the end of the previous function:
/**
* Below code save extra fields.
*/
function twooc_save_extra_register_fields( $customer_id ) {
    if ( isset( $_POST['billing_phone'] ) ) {
                 // Phone input filed which is used in WooCommerce
                 update_user_meta( $customer_id, 'billing_phone', sanitize_text_field( $_POST['billing_phone'] ) );
          }
      if ( isset( $_POST['billing_first_name'] ) ) {
             //First name field which is by default
             update_user_meta( $customer_id, 'first_name', sanitize_text_field( $_POST['billing_first_name'] ) );
             // First name field which is used in WooCommerce
             update_user_meta( $customer_id, 'billing_first_name', sanitize_text_field( $_POST['billing_first_name'] ) );
      }
      if ( isset( $_POST['billing_last_name'] ) ) {
             // Last name field which is by default
             update_user_meta( $customer_id, 'last_name', sanitize_text_field( $_POST['billing_last_name'] ) );
             // Last name field which is used in WooCommerce
             update_user_meta( $customer_id, 'billing_last_name', sanitize_text_field( $_POST['billing_last_name'] ) );
      }
}
add_action( 'woocommerce_created_customer', 'twooc_save_extra_register_fields' );
In the above code. I have created function twooc_save_extra_register_fields($customer_id) which will save the data of the custom fields in the database.
All done, It’s time to ensure that the data in the custom fields is stored in the database? To check it, register your account and go to your billing address. Here you can see that the first name , the last name and phone are automatically added to the billing address.

It indicates that custom fields are being successfully added to your WooCommerce Registration Form.
Conclusion
Well, This tutorial provide you complete steps to Add custom fields to WooCommerce registration form which is My Account page of WooCommerce. I hope you found this tutorial helpful for your project. Keep learning!. If you face any problem – I am here to solve your problems.
Are you want to get implementation help, or modify or extend the functionality of this script? Submit a paid service request


Pradeep Maurya is the Professional Web Developer & Designer and the Founder of “Tutorials website”. He lives in Delhi and loves to be a self-dependent person. As an owner, he is trying his best to improve this platform day by day. His passion, dedication and quick decision making ability to stand apart from others. He’s an avid blogger and writes on the publications like Dzone, e27.co