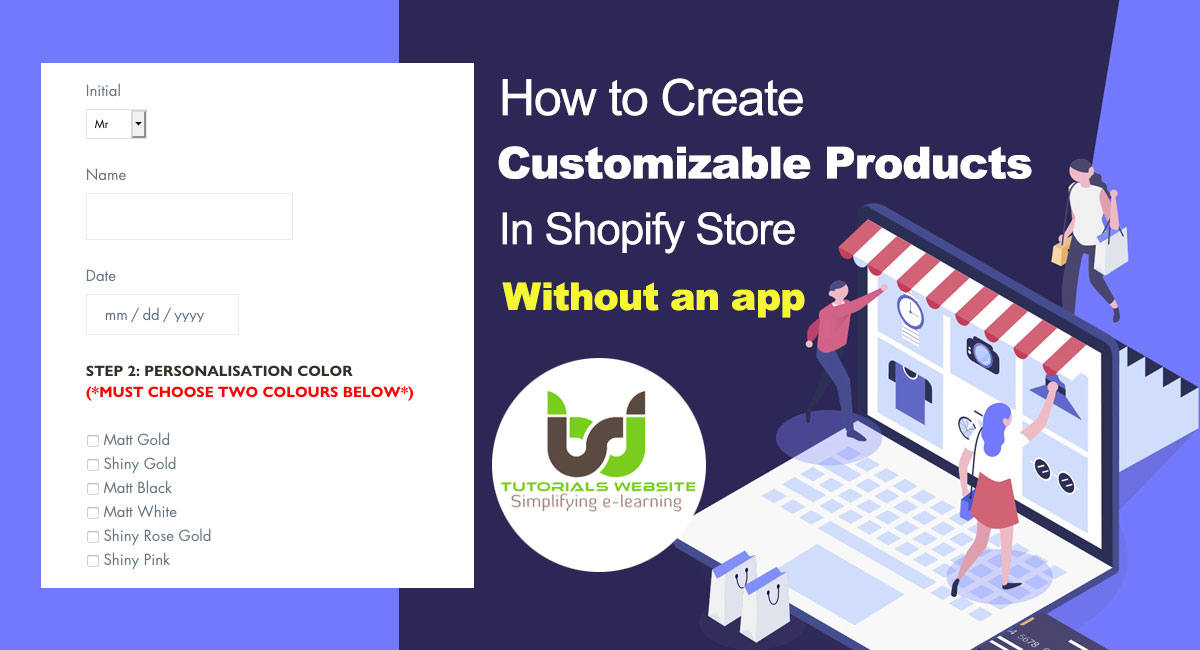
You may need to let your customers customizable products in Shopify before checkout on your store. You may offer monogram, or you may need to let customers insert a text like Name, date, custom color, or you may want to let them choose from other custom options.
There are a lot of apps that can do this, but apps are expensive and they monitor your store by adding extra scripts and slowing down your site.
Luckily, In this article i will explain every steps, so that you can do to offer custom products without paying for an app. Plus, these techniques only require a small amount of code (no JavaScript), so your site won’t slow down.
Also Read: Complete Shopify Tutorials For Beginners In Hindi
Get customization information for products
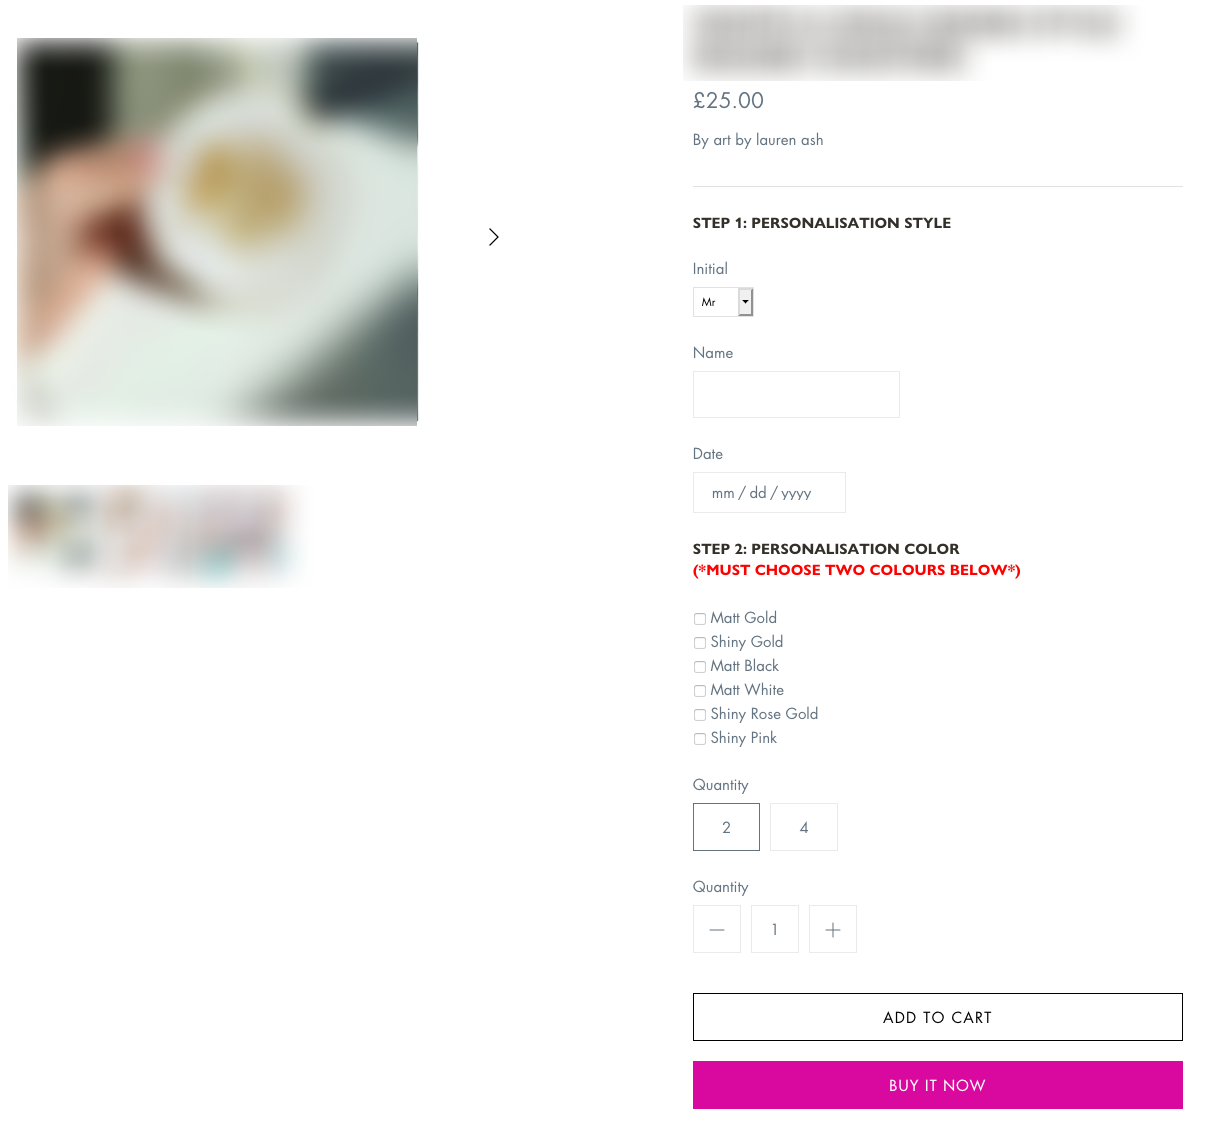
Below is an example of customized product options that can be set up. You can build any combination of the options shown below, including text inputs (small or large text areas), checkboxes, file uploads, drop-downs, and radio buttons.
Instructions: Create customizable products in Shopify or CUSTOM PRODUCT OPTIONS in Shopify – Without the App
Note: In this tutorial, I’m using the paid theme as an example. However, the steps are basically the same no matter what theme you’re using.
Step 1: Create a new product template
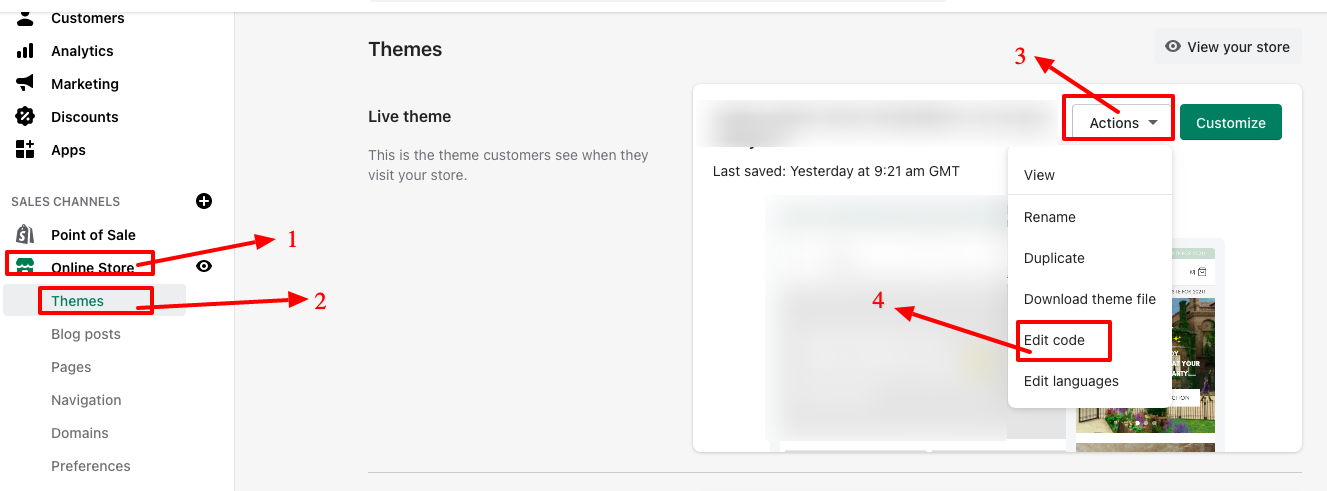
After login in your Shopify Dashboard, go to Online Store > Themes > Action > Edit Code
Search the Templates folder, click “Add a new template.”
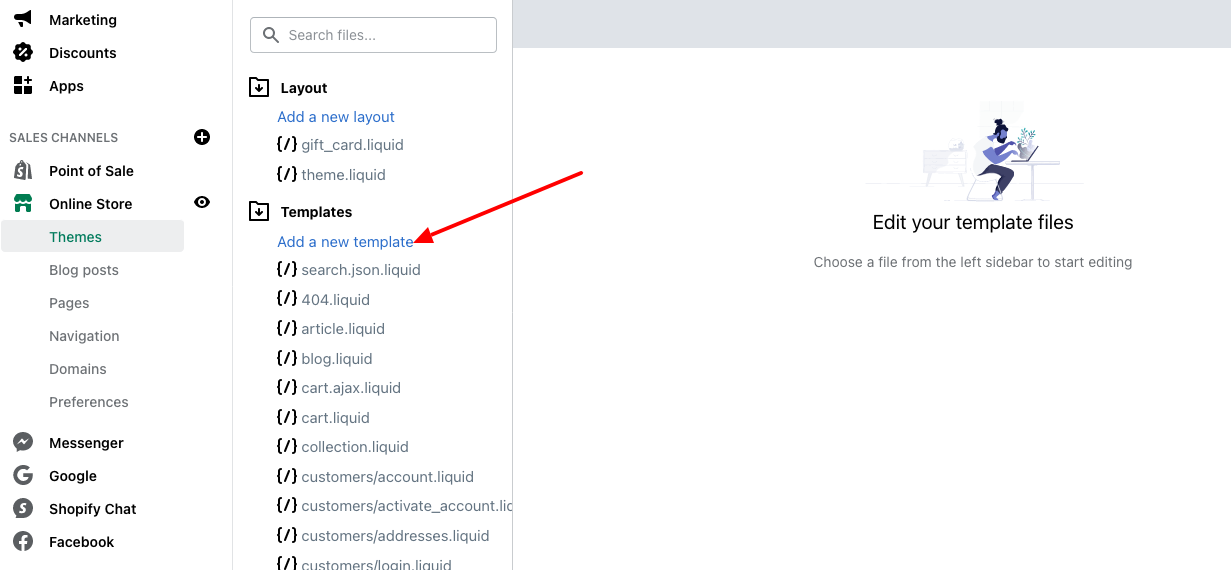
In the window that appears, choose “product” and name it “personalised“.
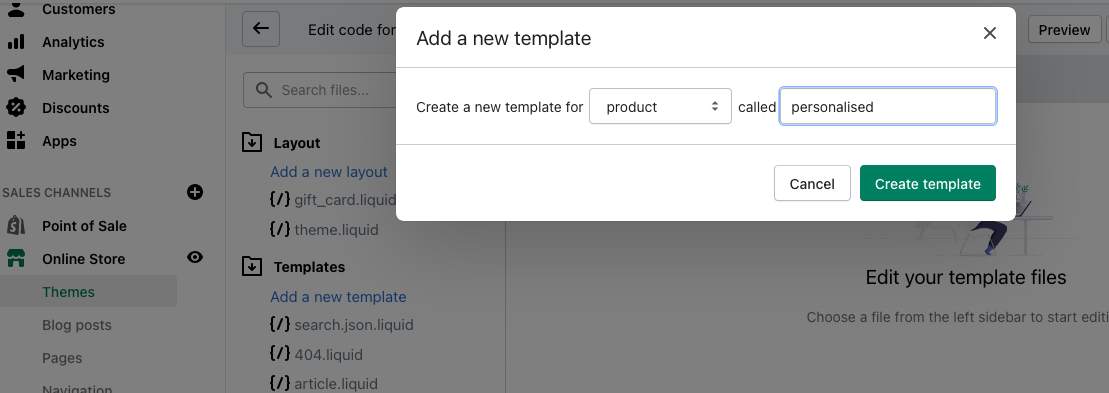
Note: The name you give the new template can be anything you want, but I’ll use “persobalised” in the tutorial.
Click the “Create template” button to create your new template.
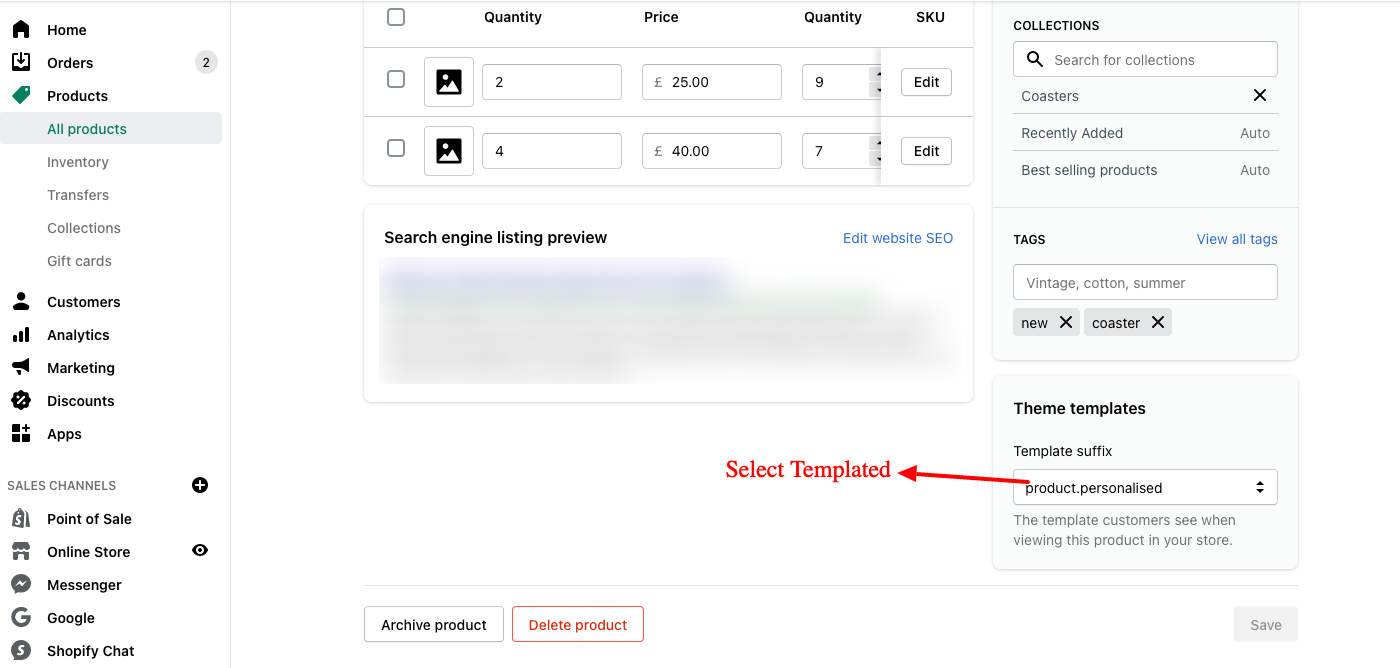
Next, go to the Products area of your Shopify Dashboard, open the product that you want to customized and use this template for, and choose the new template.
Step 2: Add the form fields code that you want to use
The most important point of this process is to find out where to apply the code. I suggest that you add it just above the Add to Cart button and the quantity area.
In many other themes, this isn’t going to be in the product template that we just created. If you can’t find it in the product.personalised.liquid, go to the Snippets folder and check for a snippet called “product-form,” “product,” or “form.”
If your theme uses Sections, check in the Section titled “product-template.liquid“.
Create new section for created new product template and titled “product-personalised-template.liquid” and copy the code from “product-template.liquid” and paste to “product-personalised-template.liquid“.
Also replace “product-template.liquid” section with “product-personalised-template.liquid” in your custom created template.
The Add to Cart button will be somewhere between two HTML form tags that look like this:
<form>
...(Add to Cart will be somewhere in the middle)...
</form>
We’re going to add our custom fields just above that (where the red box is pointing), so add a few lines of extra space there.
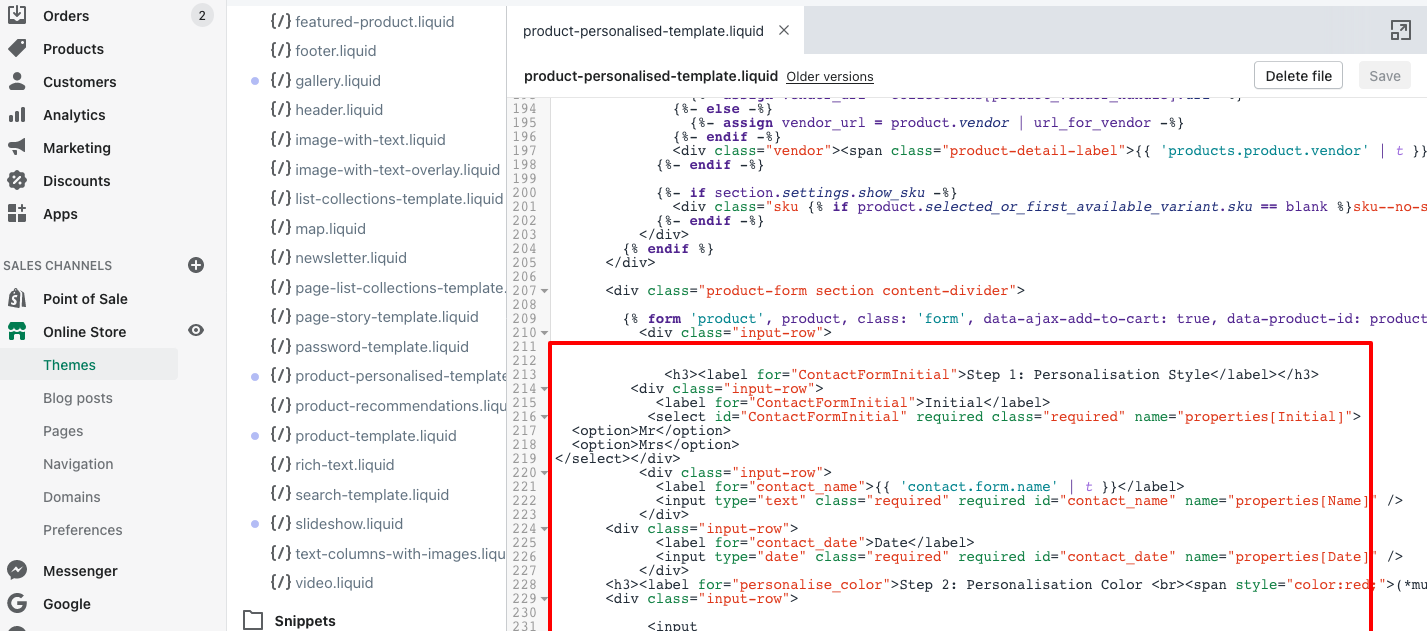
This is where we’ll be adding the code for your custom product options.
I’ve provided you with code templates below for all of the custom options you can add. Just pick whatever fields you want to add, and copy/paste the code into your product template or section. Make sure to place this code in the [replace this with your custom options… ] line from the code snippet above.
Drop-down select

Small Text

Date Box

Checkboxes

Matt Gold


Shiny Gold


Matt Black


Matt White


Shiny Rose Gold


Shiny Pink
Take a look at your product and see how it looks so far!
Step 3: Customize the Cart page to show your custom product options
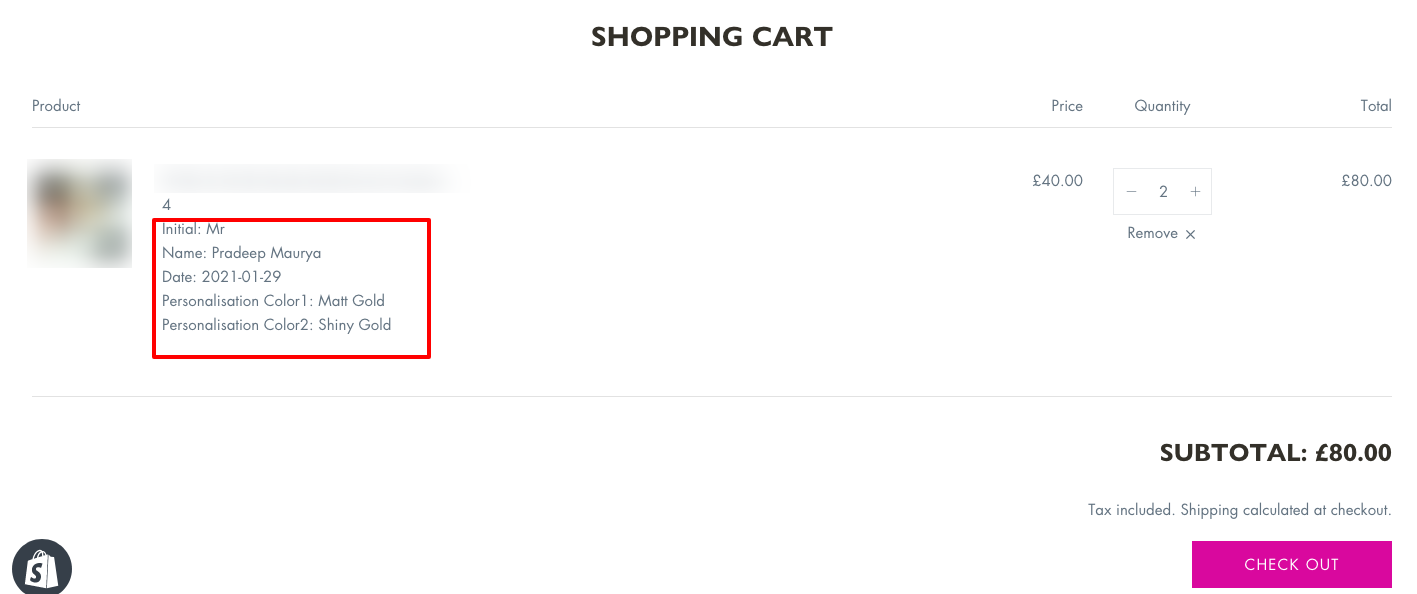
Some themes (like my paid theme) already have the necessary code installed on the cart page to show the line item properties (custom product options). To check and see if your theme already does this, just try adding the product to your cart and see if the product options show up on the cart page, like this:
If your theme doesn’t already show this info on the Cart page, and you want it to, follow the steps below:
- In your Theme Editor, open the cart.liquid template if you will not find below the code and only get code section with name “cart-template” then in Sections open your “cart-template.liquid” file.
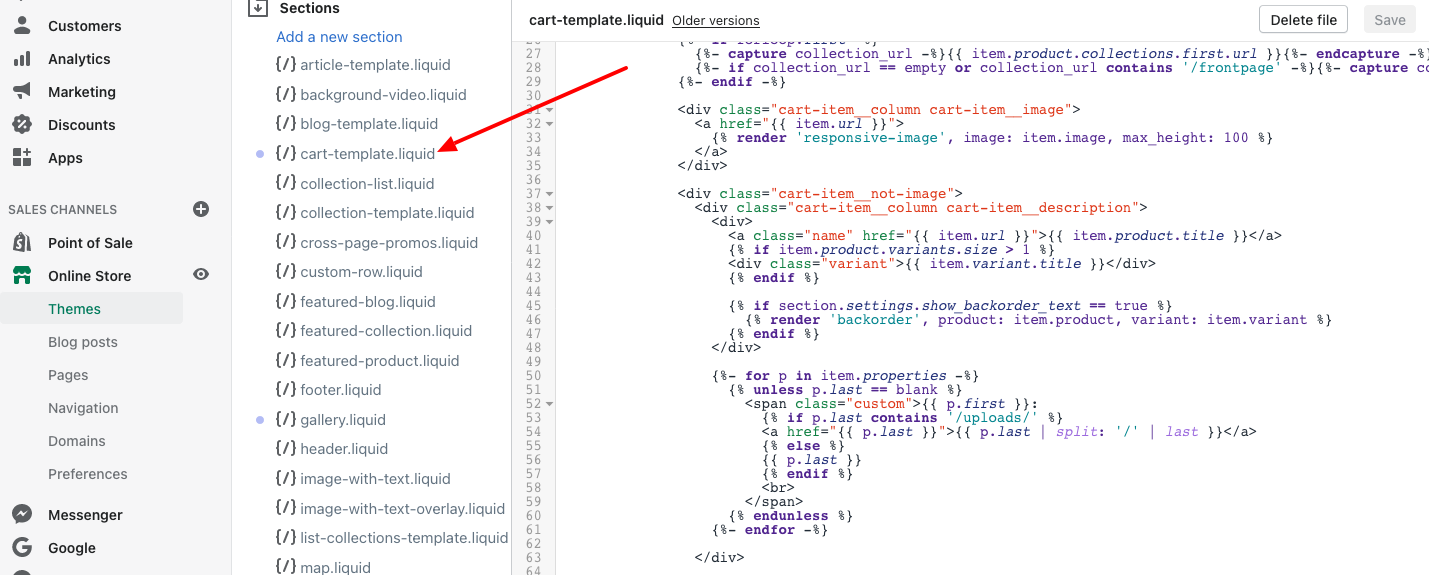
2. Find the code {{ item.product.title }}. Just below it, add the following:
{% assign property_size = item.properties | size %}
{% if property_size > 0 %}
{% for p in item.properties %}
{% unless p.last == blank %}
{{ p.first }}: {{ p.last }}
<br>
{% endunless %}
{% endfor %}
{% endif %}
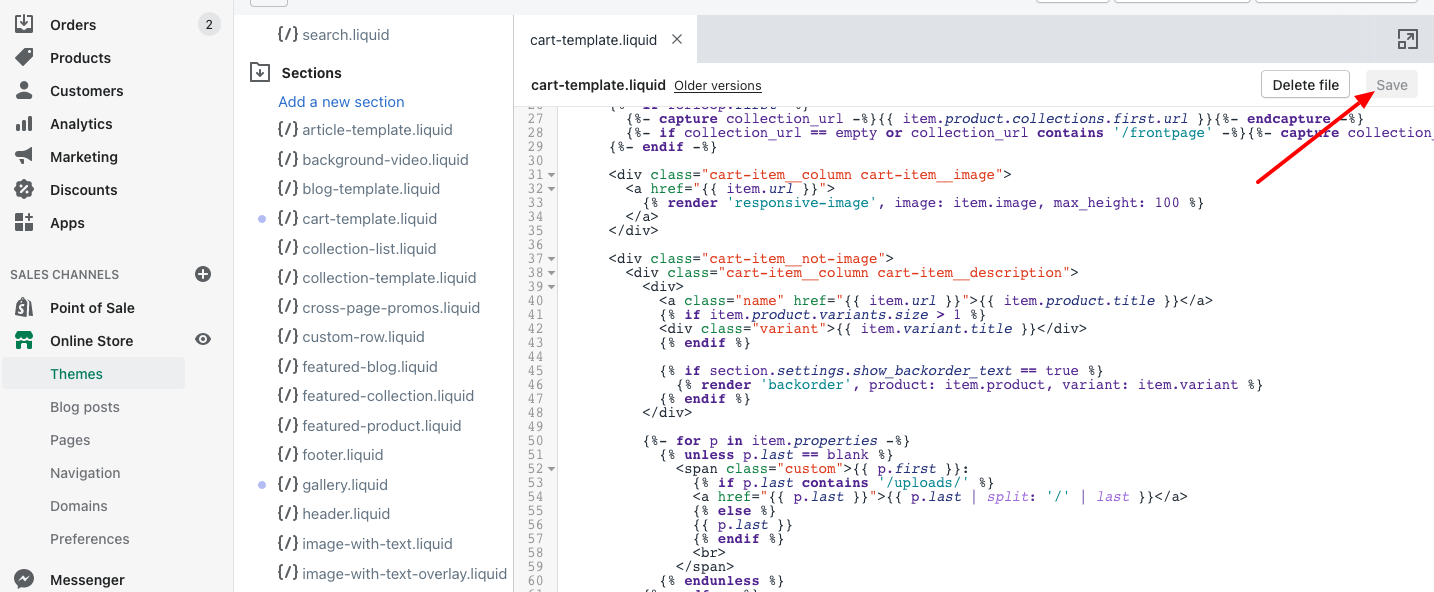
3. Find the code “/cart/change”. It will be part of a <a href…> tag, so it will look something like this: <a href=”/cart/change… >
Replace everything between the quotation marks with the following: /cart/change?line={{ forloop.index }}&quantity=0
The final result should look something like this, though it may be slightly different, depending on your theme–the important thing is that everything between the quotation marks is the same as what’s below:
<a href="/cart/change?line={{ forloop.index }}&quantity=0">Remove</a>
Hit Command F or Cntrl F and look for any other instances of /cart/change in the cart.liquid template, and repeat the above process everywhere else you find it.
4) Find every instance of the following in cart.liquid:
updates[{{ item.id }}]
Replace it with the following:
name="updates[]"
5) Save your changes
Step 4: Customize order confirmation emails
You also need to customize the order confirmation email that customers receive to include the custom options.
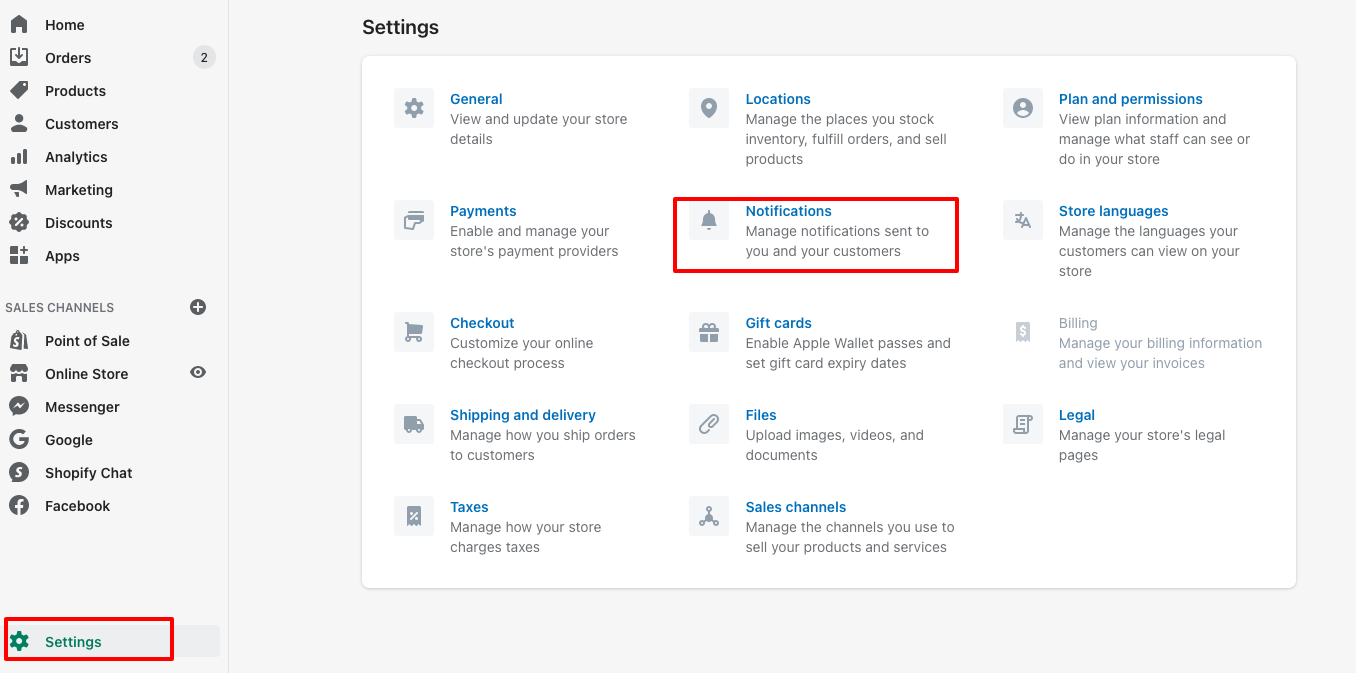
To set this up, go in your Shopify Dashboard to Settings > Notifications.
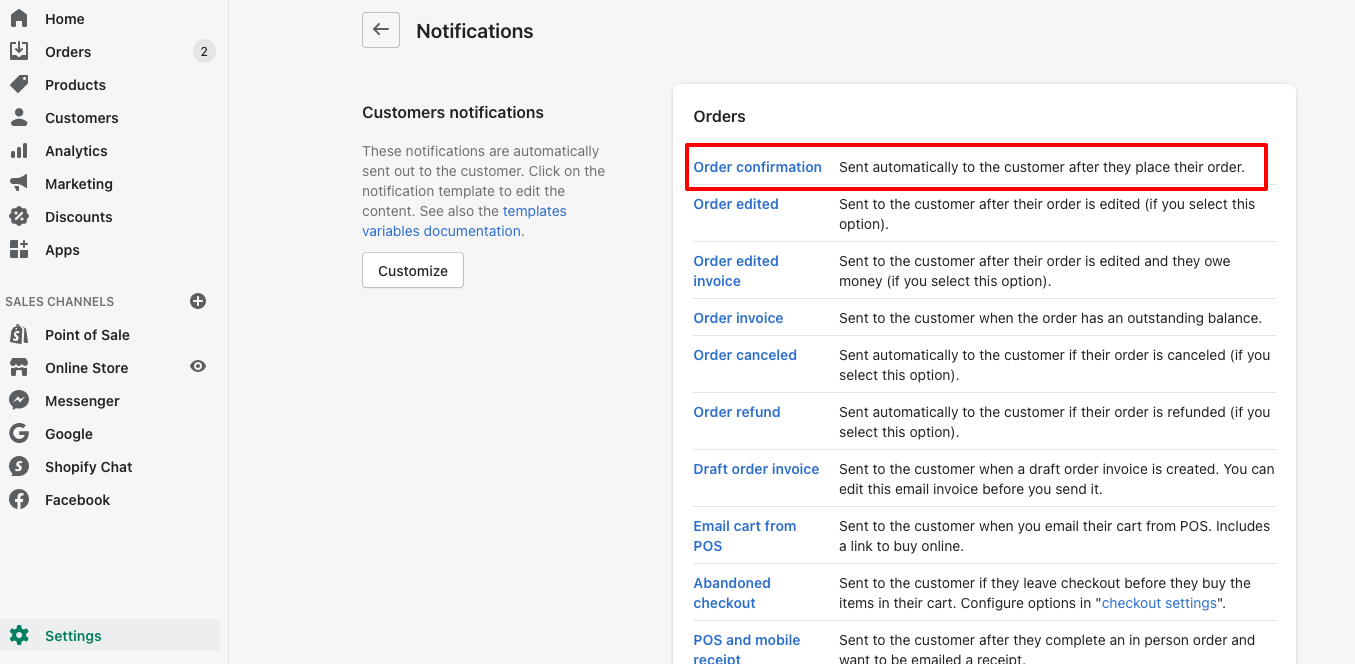
Open the Order Confirmation email template,
Find the code {{ line.title }}.
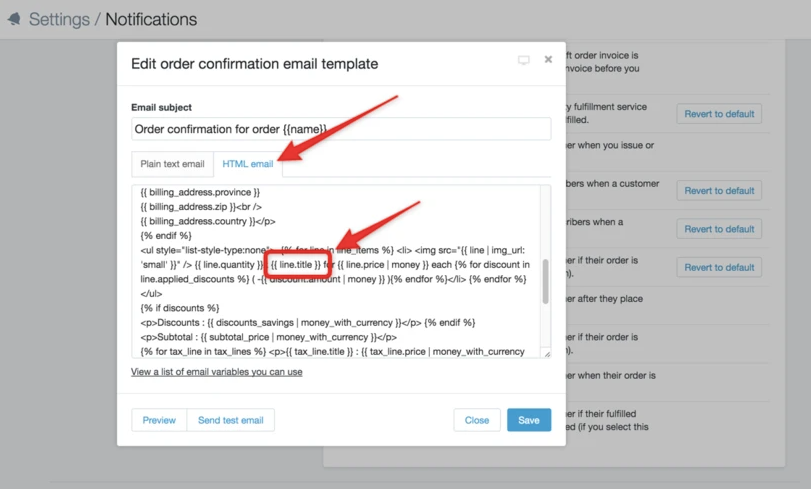
Replace it with the following:
{{ line.title }}{% for p in line.properties %}{% unless p.last == blank %} - {{ p.first }}: {{ p.last }}{% endunless %}{% endfor %}
Click on the “HTML email” tab and repeat the process of replacing {{ line.title }} with the code above.
Do this process on any other emails that you want to include the line item properties (custom product options). I recommend doing this on the “New order” email template, so that you as the store admin will be notified of what custom options the customer chose.
Also Read: How to add Conditional Checkout Fields in WooCommerce
Step 5: Test it out
Now, it’s time to test this customized work on the front-end of your website, open the product that’s using the new custom template. Choose your options, and add it to your cart.
Proceed through checkout, and check to make sure that the customizable products options in Shopify are working correctly.
Having trouble? Are you want to get implementation help, or modify or extend the functionality of this script? Submit a paid service request
Conclusion
We named the first template we made in Step-1 personalised, so name your next one custom-template or any name which you like to write. You can create as many unique templates as you want with different custom options.
Well, This tutorial provide you complete steps to How to create customizable products in Shopify without an app. I hope you found this tutorial helpful for your project. Keep learning!. If you face any problem – I am here to solve your problems.

Pradeep Maurya is the Professional Web Developer & Designer and the Founder of “Tutorials website”. He lives in Delhi and loves to be a self-dependent person. As an owner, he is trying his best to improve this platform day by day. His passion, dedication and quick decision making ability to stand apart from others. He’s an avid blogger and writes on the publications like Dzone, e27.co