If you are a WordPress developer or website owner and looking for a way to add Custom Fields into WooCommerce Checkout Page. Then you are in the right place.
Checkout fields are set up by default when you install WooCommerce on your websites, such as a first name, last name, company name, billing, or shipping address fields, and an order note, but in some cases, you want to add custom fields to achieve your requirement.
Also Read: How to Add Buy Now Button in WooCommerce without Plugin
Adding WooCommerce custom checkout fields on a checkout page according to your needs can be a real pain or a very time-consuming task. Fortunately, there is an easy way to implement this. You can follow our tutorial to get started. This tutorial will show you how to add a custom field to a WooCommerce checkout page.
Now, let’s do it with the tutorial.
Adding WooCommerce custom checkout fields on a checkout page
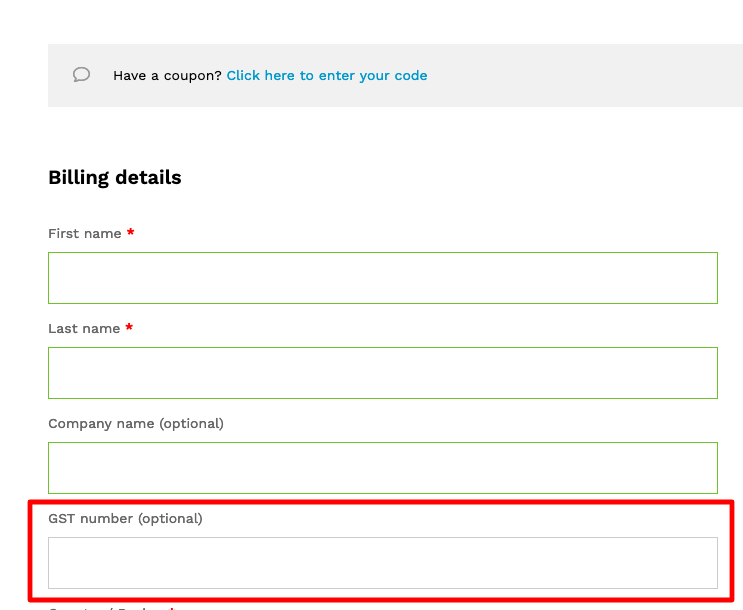
Let’s imagine you want to add a customer GST Number custom checkout field after Company Name on the WooCommerce Checkout page.
To achieve this output along with making changes to the default Checkout page certain changes will have to be made to the Order thankyou page. Minor tweaks will then have to be done to the user’s Account Address Billing page too as these changes need to be reflected there too.
Are you want to get implementation help, or modify or extend the functionality?
A Tutorialswebsite Expert can do it for you.
Step-1: Add GST Field @ WooCommerce Checkout Page
Add the below code snippet in your theme functions.php file:
/**
 * @snippet       Add GST Field @ WooCommerce Checkout Page
 */

add_filter('woocommerce_billing_fields' , 'display_billing_gst_fields');
function display_billing_gst_fields($billing_fields){
    $billing_fields['billing_gst_no'] = array(
        'type' => 'text',
        'label' =>  __('GST number',  'woocommerce' ),
        'class' => array('form-row-wide'),
        'required' => false,
        'clear' => true,
        'priority' => 35, // To change the field location increase or decrease this value
    );

    return $billing_fields;
}
Step-2: Printing the Billing Address on My Account
Add the below code snippet in your theme functions.php file:
/**
 * @snippet      Printing the Billing Address on My Account
 */

add_filter('woocommerce_billing_fields' , 'display_billing_gst_fields');
function display_billing_gst_fields($billing_fields){
    $billing_fields['billing_gst_no'] = array(
        'type' => 'text',
        'label' =>  __('GST number',  'woocommerce' ),
        'class' => array('form-row-wide'),
        'required' => false,
        'clear' => true,
        'priority' => 35, // To change the field location increase or decrease this value
    );

    return $billing_fields;
}
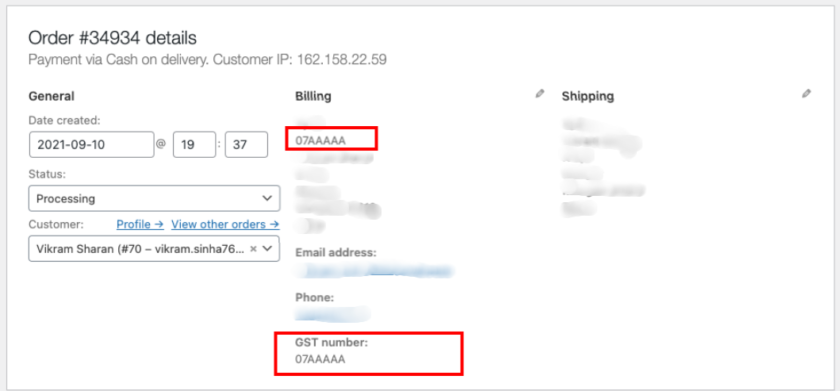
Step-3: Order Received (printed after having completed checkout)
Add the below code snippet in your theme functions.php file:
/**
 * @snippet     Checkout -- Order Received (printed after having completed checkout)
 */

add_filter( 'woocommerce_order_formatted_billing_address', 'custom_add_gst_formatted_billing_address', 10, 2 );
function custom_add_gst_formatted_billing_address( $fields, $WC_Order  ) {
    $fields['gst_no'] = $WC_Order->billing_gst_no;

    return $fields;
}
Step-4: Creating merger GST variables for printing formatting
Add the below code snippet in your theme functions.php file:
/**
 * @snippet     Creating merger GST variables for printing formatting
 */

add_filter( 'woocommerce_formatted_address_replacements', 'custom_formatted_address_replacements', 10, 2 );
function custom_formatted_address_replacements( $replacements, $args  ) {


    $replacements['{gst_no}'] = ! empty($args['gst_no']) ? $args['gst_no'] : '';
    $replacements['{gst_no_upper}'] = ! empty($args['gst_no']) ? strtoupper($args['gst_no']) : '';

    return $replacements;
}

//Defining the Spanish formatting to print the address, including GST.

add_filter( 'woocommerce_localisation_address_formats', 'custom_localisation_address_format' );
function custom_localisation_address_format( $formats ) {


    foreach($formats as $country => $string_address ) {

        $formats[$country] = str_replace('{company}', "{company}\n{gst_no_upper}", $string_address);
    }
    return $formats;
}


add_filter( 'woocommerce_customer_meta_fields', 'custom_customer_meta_fields' );
function custom_customer_meta_fields( $fields ) {
    $fields['billing']['fields']['billing_gst_no'] = array(
        'label'       => __( 'GST number', 'woocommerce' )
    );

    return $fields;
}


add_filter( 'woocommerce_admin_billing_fields', 'custom_admin_billing_fields' );
function custom_admin_billing_fields( $fields ) {
    $fields['gst_no'] = array(
        'label' => __( 'GST number', 'woocommerce' ),
        'show'  => true
    );

    return $fields;
}

add_filter( 'woocommerce_found_customer_details', 'custom_found_customer_details' );
function custom_found_customer_details( $customer_data ) {
    $customer_data['billing_gst_no'] = get_user_meta( $_POST['user_id'], 'billing_gst_no', true );

    return $customer_data;
}
Now test the code on your checkout page, just order a product and do the complete checkout process. You will get the GST number after company name on the checkout thank you page as well as everywhere under billing address details.
Also Read: How to add Conditional Checkout Fields in WooCommerce
Conclusion
Well, In this article you will get the complete steps to Add Custom Fields into WooCommerce Checkout Page. You can extend the functionality as per your requirement. I hope you found this tutorial helpful for your project. Keep learning!.
Are you want to get implementation help, or modify or extend the functionality?
A Tutorialswebsite Expert can do it for you.

Pradeep Maurya is the Professional Web Developer & Designer and the Founder of “Tutorials website”. He lives in Delhi and loves to be a self-dependent person. As an owner, he is trying his best to improve this platform day by day. His passion, dedication and quick decision making ability to stand apart from others. He’s an avid blogger and writes on the publications like Dzone, e27.co