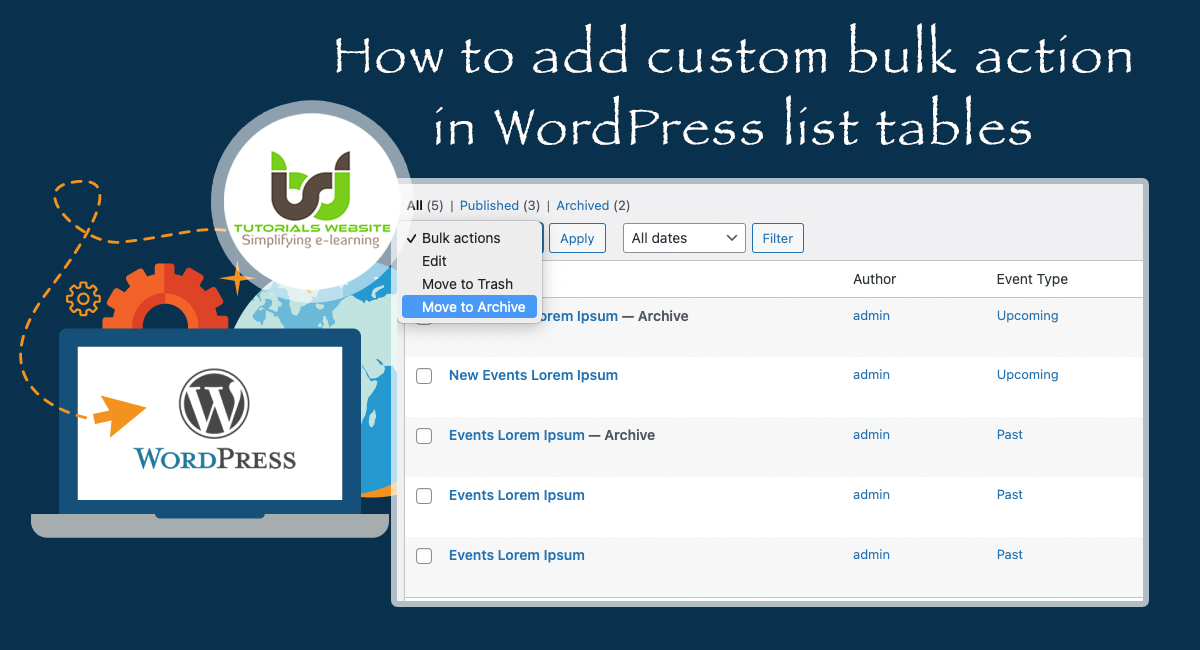
WordPress have default option to select multiple posts or page at once and perform the bulk edit and delete action. Using this feature you can anything you want onto the selected elements. Please refer the below image
If you are a WordPress developer and want to add your own custom bulk action for post, page, or custom post type then you must need to read this article.
Suggested Topic: Remove “Archive:”, “Category:”, “Tag:”, “Author:” from the_archive_title in WordPress
Adding a custom bulk action in WordPress
In this article, you will get the complete step to create your own custom bulk action in the WordPress admin dropdown list. For this, we apply the filter bulk_actions_<screen>, where <screen> is the name of the admin screen you want to use.
Please find the below complete possible options for the screen:
bulk_actions-edit-post: Post type ‘post’ edit screenbulk_actions-edit-page: Post type ‘page’ edit screenbulk_actions-edit-<post-type-name>: Custom post type edit screenbulk_actions-edit-<custom-taxonomy>: Custom taxonomy edit screenbulk_actions-edit-comments: Comments list screenbulk_actions-plugins: Plugins list screenbulk_actions-users: Users list screenbulk_actions-upload: Media library list (only works in list view, not grid view)
The above filter is applied onto an array with key and value pairs; where the key is a unique key for actions, and value is the label that appears in the dropdown.
Let’s use the below example. Here we will create a bulk action for Move to Archive multiple posts at once.
// if you want to add bulk actions to post, use bulk_actions-edit-post

add_filter('bulk_actions-edit-post', function($bulk_actions) {
	$bulk_actions['move-to-archive'] = __('Move to Archive', 'txtdomain');
	return $bulk_actions;
});
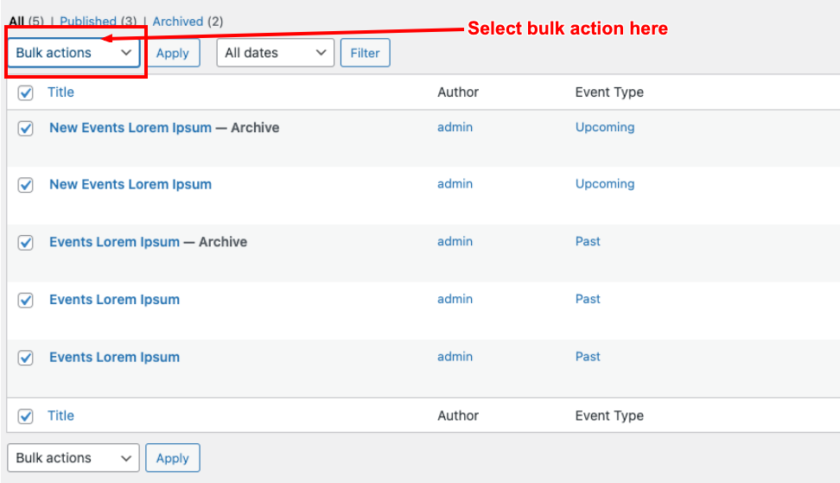
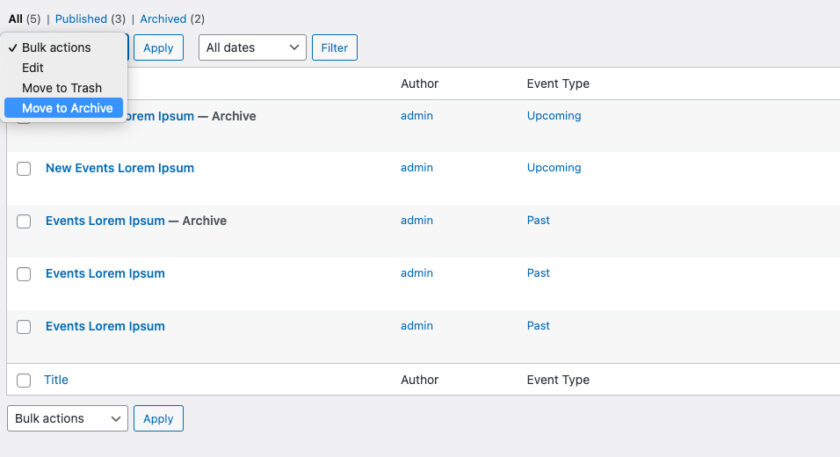
Once you’ve added the code above to your theme functions.php file, you should get the result below:
Are you want to get implementation help, or modify or extend the functionality?
A Tutorialswebsite Expert can do it for you.
How to handle custom bulk action
Now we will use the filter handle_bulk_actions-<screen> to trigger action to do something as per our newly created bulk action. Just do not forget to replace <screen>
add_filter('handle_bulk_actions-edit-post', function($redirect_url, $action, $post_ids) {
	if ($action == 'move-to-archive') {
		foreach ($post_ids as $post_id) {
			wp_update_post([
				'ID' => $post_id,
				'post_status' => 'archive'
			]);
		}
		$redirect_url = add_query_arg('move-to-archive', count($post_ids), $redirect_url);
	}
	return $redirect_url;
}, 10, 3);
In the above code, you will get three possible arguments in this filter.
- $redirect_url : is actually an URL that WordPress should redirect to after it’s finished with your bulk action.
- $action : is the name of the action that was chosen in the dropdown.
- $post_ids : is an array of all element IDs that were checked for the bulk action
Show a custom notice after our custom bulk action
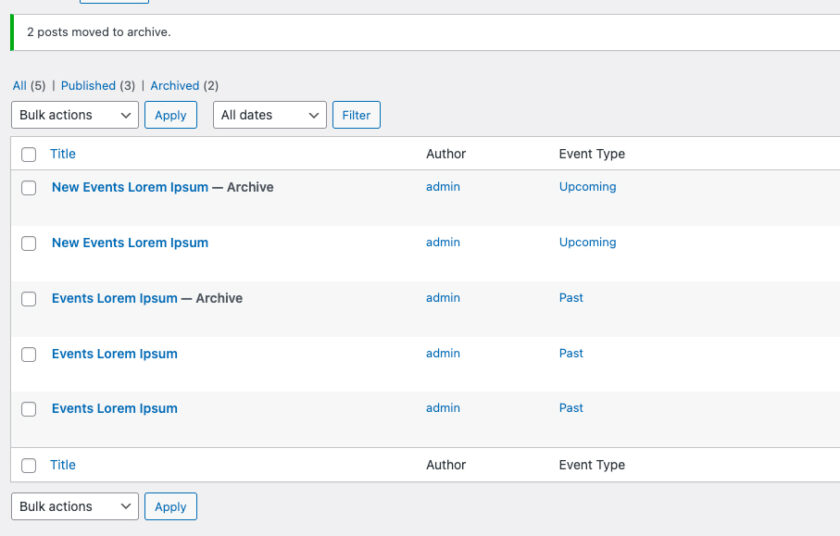
The last step is to define custom notices. This allows us to add a custom admin notice which triggers if ‘move-to-archive’ is set. You can set admin notice something like “2 posts moved to archive” where “2” is the number of posts we applied our action onto or create a more detailed message.
In order to show admin notices, we will use the action admin_notices.
add_action('admin_notices', function() {
if (!empty($_REQUEST['move-to-archive'])) {
$num_changed = (int) $_REQUEST['move-to-archive'];
printf('' . __('%d posts moved to archive.', 'txtdomain') . '
', $num_changed);
}
});
That’s how it looks:
Thanks for reading 🙏 I hope you found this tutorial helpful for your project. Keep learning!.
Are you want to get implementation help, or modify or extend the functionality of this script? submit your paid request

Pradeep Maurya is the Professional Web Developer & Designer and the Founder of “Tutorials website”. He lives in Delhi and loves to be a self-dependent person. As an owner, he is trying his best to improve this platform day by day. His passion, dedication and quick decision making ability to stand apart from others. He’s an avid blogger and writes on the publications like Dzone, e27.co