Authorize.Net payment gateway is one of the most used payment systems in applications for eCommerce. It supports the standard Visa, MasterCard, Discover, Google Pay, PayPal, Apple Pay, and all popular similar services. The payment gateway Authorize. Net provides a simple and effective solution for integrating an online checkout system with a smooth payment experience.
The payment gateway is the most important part of the online payment application. There are different payment gateways available to integrate the credit card payment system on the website. Like the Stripe payment gateway, 2Checkout Payment Gateway, Paypal Payment System. In this article, we will see how to make payment transactions to charge a credit card using the Authorize.Net Payment Gateway in PHP.
Steps to Integrate Authorize.Net Payment Gateway
Step-1: Create Authorize.Net sandbox account to get API Login id ad Key from here. After account creation, Sandbox is used to test the integration of the payment gateway. The following screenshot shows the generated API login Id and key.
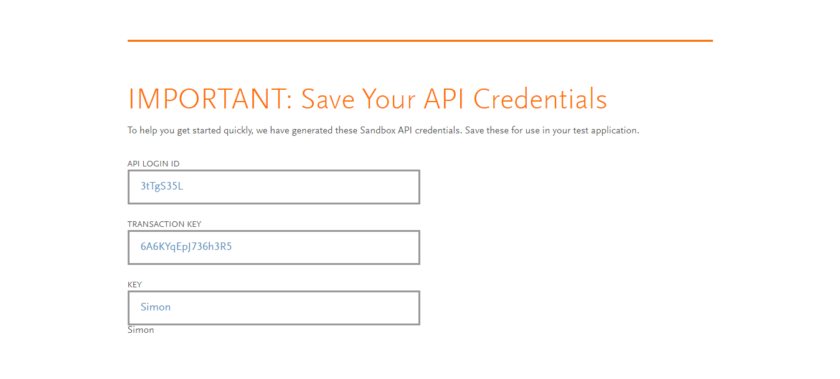
Copy and paste the API Login ID and Transaction Key on the notepad to later use in the script.
Step-2: Create Database Table
To store the transaction details, a table needs to be created in the database. So, copy the below MySQL query and run this query in the MySQL database.
/// Copy and paste this query to create transaction_details CREATE TABLEtransaction_details(idint(11) NOT NULL AUTO_INCREMENT,namevarchar(50) COLLATE utf8_unicode_ci NOT NULL,item_namevarchar(255) COLLATE utf8_unicode_ci NOT NULL,item_numbervarchar(50) COLLATE utf8_unicode_ci NOT NULL,item_pricefloat(10,2) NOT NULL,item_price_currencyvarchar(10) COLLATE utf8_unicode_ci NOT NULL,card_numberbigint(20) NOT NULL,card_exp_monthvarchar(2) COLLATE utf8_unicode_ci NOT NULL,card_exp_yearvarchar(5) COLLATE utf8_unicode_ci NOT NULL,paid_amountvarchar(10) COLLATE utf8_unicode_ci NOT NULL,txn_idvarchar(50) COLLATE utf8_unicode_ci NOT NULL,payment_statusvarchar(25) COLLATE utf8_unicode_ci NOT NULL COMMENT 'Ok | Error',payment_responseenum('1','2','3','4') COLLATE utf8_unicode_ci NOT NULL COMMENT '1=Approved | 2=Declined | 3=Error | 4=Held for Review',createddatetime NOT NULL,modifieddatetime NOT NULL, PRIMARY KEY (id) ) ENGINE=InnoDB DEFAULT CHARSET=utf8 COLLATE=utf8_unicode_ci;
Step-3: Create Authorize.Net API and Database Configuration (authConfig.php)
Note: Authorize.Net API Login ID and Transaction Key will be found in the API Credentials & Keys section of your Authorize.Net merchant account.
Step-4: Create Database Connection (dbconfig.php)
connect_errno) {
    printf("Connect failed: %s\n", $db->connect_error);
    exit();
}
Step-5: Payment Checkout Form (index.php)
Before any HTML code, including the configuration file. Create an HTML form for collecting information from the customer on the user (such as e-mail and name) and card details (card number, expiration and CVC no.). After submission of the form, data is submitted to the script (payment.php) for processing the credit card payment.
Charge with Authorize.Net
Item Name:
Price:
Step-6: Import PHP SDK to access Authorize.Net API
For the processing of payments, we need the PHP SDK to access the Autorize.Net API. The composer must import this SDK. Make sure you install the composer on your computer and create a composer.json file and add the below script.
{
  "require": {
    "php": ">=5.6",
    "ext-curl": "*",
    "authorizenet/authorizenet": ">=1.9.3"
  }
}
Then, run the following command.
composer update
After this, you will get the vendor folder. We will use this folder to the next step for the Authorize.Net payment process.
Step-7: Create (AuthorizeNetPayment.php) file to add the Request Payment Process code
APILoginId = ANET_API_LOGIN_ID;
        $this->APIKey = ANET_TRANSACTION_KEY;
        $this->APIENV = ANET_ENV;
         // Set the transaction's reference ID
        $this->refId = 'ref' . time();
        $this->merchantAuthentication = $this->setMerchantAuthentication();
        $this->responseText = array("1"=>"Approved", "2"=>"Declined", "3"=>"Error", "4"=>"Held for Review");
    }

    public function setMerchantAuthentication()
    {
        // Create a merchantAuthenticationType object with authentication details
        $merchantAuthentication = new AnetAPI\MerchantAuthenticationType();
        $merchantAuthentication->setName($this->APILoginId);
        $merchantAuthentication->setTransactionKey($this->APIKey);

        return $merchantAuthentication;
    }

    public function setCreditCard($cardDetails)
    {    // Create the payment data for a credit card
        $creditCard = new AnetAPI\CreditCardType();
        $creditCard->setCardNumber(preg_replace('/\s+/', '', $cardDetails["card_number"]));
        $creditCard->setExpirationDate( $cardDetails["card_exp_year"] . "-" . $cardDetails["card_exp_month"]);
        $creditCard->setCardCode($cardDetails["card_cvc"]);
        $paymentType = new AnetAPI\PaymentType();
        $paymentType->setCreditCard($creditCard);

        return $paymentType;
    }

    public function setOrder($itemName)
    {
        // Create order information
    $order = new AnetAPI\OrderType();
    $order->setDescription($itemName);

        return $order;
    }

     public function setCustomer($email)
    {
      // Set the customer's identifying information
    $customerData = new AnetAPI\CustomerDataType();
    $customerData->setType("individual");
    $customerData->setEmail($email);

        return $customerData;
    }

    public function setTransactionRequestType($paymentType, $amount,$order,$customerData)
    {    // Add the payment data to a paymentType object
        $transactionRequestType = new AnetAPI\TransactionRequestType();
        $transactionRequestType->setTransactionType("authCaptureTransaction");
        $transactionRequestType->setAmount($amount);
        $transactionRequestType->setOrder($order);
        $transactionRequestType->setPayment($paymentType);
        $transactionRequestType->setCustomer($customerData);

        return $transactionRequestType;
    }

    public function chargeCreditCard($cardDetails)
    {

        $paymentType = $this->setCreditCard($cardDetails);
         $order = $this->setOrder($cardDetails['item_name']);
            $customerdata = $this->setCustomer($cardDetails['email']);
        $transactionRequestType = $this->setTransactionRequestType($paymentType, $_POST["amount"],$order,$customerdata);

        // Create a transaction
        $request = new AnetAPI\CreateTransactionRequest();
        $request->setMerchantAuthentication($this->merchantAuthentication);
        $request->setRefId( $this->refId);
        $request->setTransactionRequest($transactionRequestType);
        $controller = new AnetController\CreateTransactionController($request);
        $response = $controller->executeWithApiResponse(constant("\\net\authorize\api\constants\ANetEnvironment::$this->APIENV"));

        return $response;
    }
}
Step-8: Create (payment.php) to Charge Credit Card and get Authorize.net Payment Response and Update Database
The AuthorizeNetPayment class instance is created in the below PHP code and the request for a charge credit card is created. As a result, the function returns the payment response in JSON format.
chargeCreditCard($_POST);

    if ($response != null)
    {
        $tresponse = $response->getTransactionResponse();

        if (($tresponse != null) && ($tresponse->getResponseCode()=="1"))
        {
            // Transaction info
                $transaction_id = $tresponse->getTransId();
                $payment_status = $response->getMessages()->getResultCode();
                $payment_response = $tresponse->getResponseCode();
                $auth_code = $tresponse->getAuthCode();
                $message_code = $tresponse->getMessages()[0]->getCode();
                $message_desc = $tresponse->getMessages()[0]->getDescription();

                        require_once "dbconfig.php";
         // Insert tansaction data into the database
                $sql = "INSERT INTO transaction_details (name,email, item_name, item_number, item_price, item_price_currency, card_number, card_exp_month, card_exp_year, paid_amount, txn_id, payment_status, payment_response, created,modified) VALUES ('".$name."', '".$email."', '".$itemName."', '".$itemNumber."', '".$itemPrice."','". $currency."', '".$card_number."', '".$card_exp_month."', '".$card_exp_year."', '".$itemPrice."', '".$transaction_id."', '".$payment_status."', '".$payment_response."', NOW(), NOW())";
                $insert = $db->query($sql);
                $paymentID = $db->insert_id;
                $ordStatus = 'success';
                $statusMsg = 'Your Payment has been Successful!';

        }else
        {
            $authCode = "";
            $paymentResponse = $tresponse->getErrors()[0]->getErrorText();
            $reponseType = "error";
            $statusMsg  = "Charge Credit Card ERROR :  Invalid response\n";
        }
    }
    else
    {
        $reponseType = "error";
        $statusMsg = "Charge Credit Card Null response returned";
    }
}
?>


		Payment Information
		Reference Number:
		Transaction ID:
		Status:

		Product Information
		Name:
		Price:

		Your Payment has Failed
Test Card Details
To test the Authorized.Net payment API integration, use the following test credit card information.
Expiration date: 10/2020
CVV: 123

Switch Authorize.Net Payment Mode from Sandbox to Live
It’s time to go live after testing the payment flow in the sandbox environment of Authorize. Net. Switching the payment mode from the sandbox to live is very simple.
- Login to your Authorize.Net merchant account.
- Click the Account link from the top navigation menu bar.
- Click the Settings link in the left-side menu panel. Go to the Security Settings » General Security Settings section and click the API Credentials & Keys.
- In the API Credentials & Keys page,
- You will get the API Login ID.
- For Transaction Key, select New Transaction Key and Submit.
- In the authConfig.php file,
- Replace the Sandbox API keys by the Live API credentials (Login ID and Transaction Key).
- Set environment to PRODUCTION
// Authorize.Net API configuration
define('ANET_API_LOGIN_ID', 'LIVE_API_LOGIN_ID');
define('ANET_TRANSACTION_KEY', 'LIVE_TRANSACTION_KEY');
define('ANET_ENV', 'PRODUCTION');
How to Integrate Paypal Payment System with Paypal API in PHP and MySql
Conclusion:
The payment gateway Authorize. Net provides a simple and powerful solution for enhancing the online checkout system with a smooth payment experience. Authorize. Net offers features such as payment transactions webhooks and more for building a payment solution in our application.

Pradeep Maurya is the Professional Web Developer & Designer and the Founder of “Tutorials website”. He lives in Delhi and loves to be a self-dependent person. As an owner, he is trying his best to improve this platform day by day. His passion, dedication and quick decision making ability to stand apart from others. He’s an avid blogger and writes on the publications like Dzone, e27.co