
If you want to integrate the Razorpay payment gateway into your PHP website, you’re in the right place! This tutorial guides you through the process in a simple and user-friendly way. Let’s get started and make your website payments smoother than ever.
Razorpay is your go-to choice for hassle-free online payments. It’s not just reliable; it’s super easy to set up compared to other gateways. Whether your customers prefer debit, credit, net banking, UPI, or digital wallets, Razorpay covers them.
Integrating Razorpay into a PHP application involves several steps. Below is a basic guide to getting you started. You should refer to the official Razorpay documentation for the latest information.
A Step-by-Step Guide: Integrate Razorpay payment gateway to your PHP website
Step 1: Create a Razorpay account
If you don’t have an account, sign up for a Razorpay account at https://dashboard.razorpay.com/
Step 2: Get API Keys
- Log in to your Razorpay Dashboard.
- Navigate to the “Account & Settings” > “API Keys” section to get your API key and secret key.

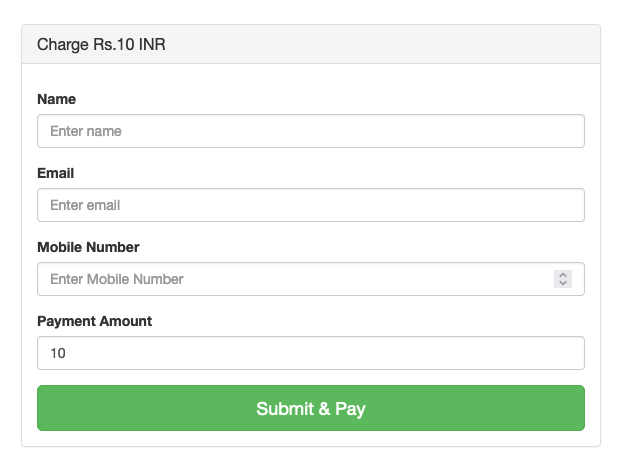
Step 3: Create your HTML form to get the customer details
Let’s create a bootstrap normal form to get customer information and amount details.
Create an index.php page and Copy and Paste the following code into your index.php file.
How to Integrate Razorpay payment gateway in PHP | tutorialswebsite.com Charge Rs.10 INR
Include the Razorpay Checkout script in your index.php file:
Now add the below script code in the index.php file, this code will act on the form submit button click. This is the Razorpay checkout js code which populates the payment popup form.
In the above JS code, When the user clicks on the pay now button we will get the customer details like name, email, mobile, and price using JS. Also, you can see the Ajax code to process the Razorpay payment. When payment succeeds or fails you will get redirected to the page based on the above script redirection.
Are you want to get implementation help, or modify or extend the functionality?
A Tutorialswebsite Expert can do it for you.
Step 4: Write the Ajax process to Create an order using Razorpay API
In this step, we’ve created the ‘submitpayment.php’ code file to manage AJAX post requests.
Within this file, you have the flexibility to handle database insertion tasks and create orders through Razorpay API calls.
$payAmount*100,
"currency"=> "INR",
"receipt"=> $note,
"notes" =>array(
	          "notes_key_1"=> $note,
	          "notes_key_2"=> ""
              )
);
$curl = curl_init();

curl_setopt_array($curl, array(
  CURLOPT_URL => 'https://api.razorpay.com/v1/orders',
  CURLOPT_RETURNTRANSFER => true,
  CURLOPT_ENCODING => '',
  CURLOPT_MAXREDIRS => 10,
  CURLOPT_TIMEOUT => 0,
  CURLOPT_FOLLOWLOCATION => true,
  CURLOPT_HTTP_VERSION => CURL_HTTP_VERSION_1_1,
  CURLOPT_CUSTOMREQUEST => 'POST',
  CURLOPT_POSTFIELDS =>json_encode($postdata),
  CURLOPT_HTTPHEADER => array(
    'Content-Type: application/json',
    'Authorization: '.$authAPIkey
  ),
));

$response = curl_exec($curl);

curl_close($curl);
$orderRes= json_decode($response);

if(isset($orderRes->id)){

$rpay_order_id=$orderRes->id;

$dataArr=array(
	'amount'=>$payAmount,
	'description'=>"Pay bill of Rs. ".$payAmount,
	'rpay_order_id'=>$rpay_order_id,
	'name'=>$billing_name,
	'email'=>$billing_email,
	'mobile'=>$billing_mobile
);
echo json_encode(['res'=>'success','order_number'=>$order_id,'userData'=>$dataArr,'razorpay_key'=>$razorpay_key]); exit;
}else{
	echo json_encode(['res'=>'error','order_id'=>$order_id,'info'=>'Error with payment']); exit;
}
}else{
    echo json_encode(['res'=>'error']); exit;
}
       ?>
Step 5: Create a Payment Success Page
After a successful payment process, users will be redirected to a success page. In the index.php file mentioned above, once you receive the success response, you’ll need to redirect the user to the payment-success.php page.
Use the below payment-success.php file code
";
    print_r($_GET);
    echo "";
}
?>
Output:

Step 6: Create a Payment Failed Page
Use the below payment-failed.php file code
";
    print_r($_GET);
    echo "";
}
?>
That’s it.
Payment Test Card Details

Wrapping Words
These are the simple and easy steps to Integrate Razorpay Payments to Your PHP Website. You can modify and customize code as per your requirements.
Note: Please replace ‘YOUR_API_KEY’, ‘YOUR_SECRET_KEY’, ‘YOUR_REDIRECT_URL’, and other placeholders with your actual credentials and data.
Do you want to get implementation help, or modify or extend the functionality of this script? Submit a paid service request
FAQs
If you don’t have an account, sign up for a Razorpay account at https://dashboard.razorpay.com/
Razorpay is your go-to choice for hassle-free online payments. It’s not just reliable; it’s super easy to set up compared to other gateways. Whether your customers prefer debit, credit, net banking, UPI, or digital wallets, Razorpay covers them.
1. Log in to your Razorpay Dashboard.
2. Navigate to the “Account & Settings” > “API Keys” section to get your API key and secret key.
Please find the below card details
You can hire “Pradeep Maurya Freelance Developer” to integrate RazorPay Payment Gateway in your website. You can directly content on WhatsApp: +91-8218920611
1. Razorpay
2. PhonePe
3. Cashfree Payments.
4. PayU.
5. Instamojo.

Pradeep Maurya is the Professional Web Developer & Designer and the Founder of “Tutorials website”. He lives in Delhi and loves to be a self-dependent person. As an owner, he is trying his best to improve this platform day by day. His passion, dedication and quick decision making ability to stand apart from others. He’s an avid blogger and writes on the publications like Dzone, e27.co